
DIY Succulent Planter

Here is a quick mantel succulent planter project for you that will add more greenery to your home, making it feel fresh!
Every time I put plants in my house, I get this sudden relief of stress and it just feels so good to be surrounded by nature. Not that I know how to keep plants alive for very long…that’s not what this post is about…this is just getting you to the point of being able to put them in your home in a unique way. Maybe someday my black thumb will turn green!
Follow along with the plans below to make this planter for less than $10 in lumber. Most home improvement stores will carry the wood that you need, which is a 4×4 board that is not pressure treated. You may be able to find a board shorter than 8ft long, but most don’t carry them shorter than 8ft. If that’s the case, you can make two of these, or save the leftovers for another project! Check out these candle holders that are also made with a 4×4 and the same 1 ½” spade bit used in this project.
*This post contains affiliate links at no extra cost to you. View my full disclosure here.
What you’ll need:
Materials:
- (1) 4 x 4 x 8’ lumber (make sure it is not pressure treated!)
- Stain or paint- I used Minwax Weathered Oak
- Succulents
Tools used:
- Miter saw
- Drill
- 1 ½” Spade bit
- Router with roundover bit (optional)
- Orbital sander
Cut list:
- (1) 4 x 4 x 48”
Step 1: Cut your wood to the length you need and angle the corners
- I used my miter saw to cut the 4×4 piece of wood to 48” long.
- Next make a 10 degree cut off of each end with your miter saw. Make sure you board is facing the correct way, so that you don’t end up making parallel ends (see picture below)

Step 2: Drill holes
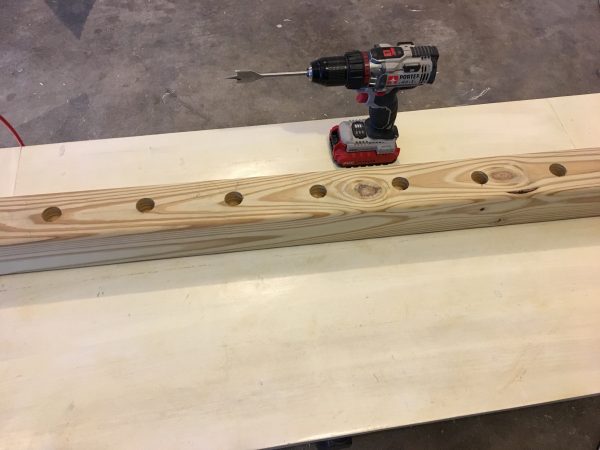
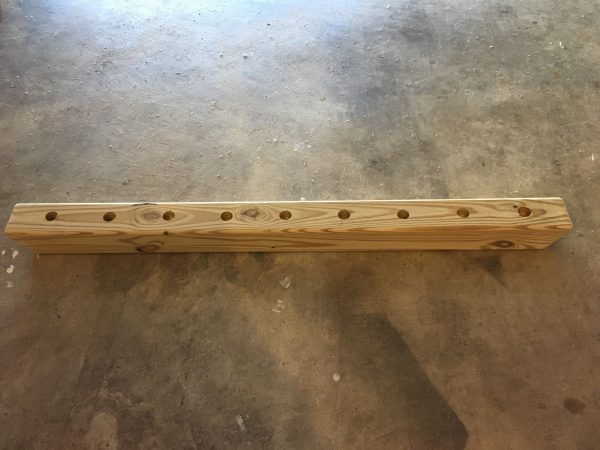
- Use your drill and 1 ½” spade bit to cut holes about 3” deep.
- I made nine holes and started by finding the very center, and then spaced my way outward. I spaced mine out so that the center of each hole is about 5 ½” apart. Draw it out on your board first to make sure that is the spacing you want.
Step 3: Route edges (optional)
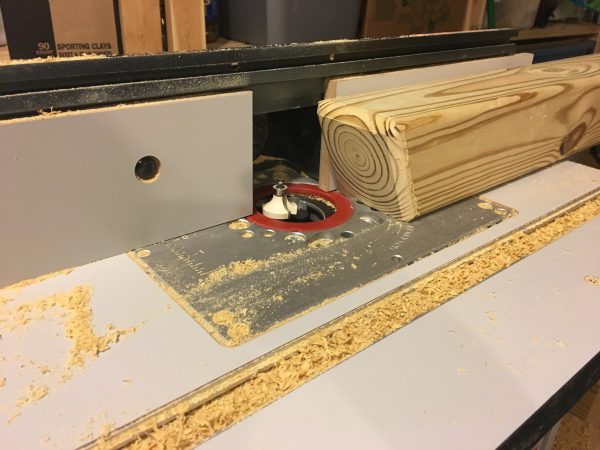
- I decided to round over the edges of my succulent planter with my router and a round over bit. This is totally optional, because you can smooth out some of those corners by sanding, but if you have a router you should totally do this! I like the softer look that the rounded edges give.

Step 4: Sand and stain
- Depending on how rough your board is, you may want to start with 80 grit sandpaper to get out all of those rough spots. I used my handy Bosch Orbital Sander to do this job! Work your way up to either 120 or 220 grit, depending on how smooth you want it.
- Stain your piece to fit your style! I used Weathered Oak by Minwax, and it took several coats for me to achieve this color. I even lost track counting, because it was so many. I love the look of it, so it was worth it!
Step 5: Add your plants
- Since we were going to move in a short time from when I made this project, and since the stores weren’t carrying the succulents I wanted yet, I chose to get some faux succulents from Hobby Lobby as a place-filler until I find what I want (and learn how to actually care for succulents, let’s be honest here).
- Live succulents should work great in this planter and I have all the faith in you that you can do it!


I made this succulent planter specifically for our mantel, and I still need to put some other décor items up there to make it a really pretty space. Hmmm, looks like I have more projects in my future!
With few tools and a small amount of time, you can totally make this planter too! Let me know if you do, and let me know all about your favorite mantel décor!
Happy building,
-Whitney
You can also find Restoring Handmade on Facebook, Instagram, and Pinterest!
Other projects you might like:



Subscribe here to get the latest news.
I solemnly swear to never spam you.